Well I'd had the old Katana for over 8 years, fixing up many things mechanical and electrical. But...
- the frame was progressively becoming more and more of an eyesore, as the grey powdercoating had been flaking off with age, vibration and heat;
- the footpeg rails had been quietly rusting through on the underside, as their ends are open to the weather and water just runs straight into them and collects;
- 2nd gear had always been a bid dodgy, prone to not engaging properly and then spitting out into neutral, thus sending the revs sky-high and the rider wincing in sympathy for the 30-year-old aircooled lump.
So it was time to do something about it all. August 2012 saw me completely stripping the machine down to a rolling chassis plus engine. Then Warwick came around and helped me heave the motor out. (I didn't get to put it on a set of scales, but maaate, those GSX1100 donks are heavy: somewhere around 90-100 kgs, I would say.) Then I undid the front steering head, and removed the forks/ handlebars/ wheel as a unit, and ditto with the rear end. So now I had a bare frame in one corner of my little garage, and a behemoth of a motor creaking on an old coffee table in the other corner. Progress!


The last time I'd split the crankcases of a motorcycle engine was on my trusty old z400. But that was a much smaller engine and lifting it was a one-man job. Not so with the Katana's motor; even just getting it upside-down safely without busting cooling fins etc. required some care and thought. But once belly-up it was easy enough to split the cases.
The real bother was that three of the crankcase bolts sheared off... alas, previous reassemblers had failed to put any lubricant on the threads — they were dry as chips with a light film of rust to top it all off. So folks, take note: never install a bare thread on anything; always use either a drop of oil, a smudge of grease, a smear of anti-seize, or a drop of thread-locking compound. But never a clean bare thread! Of course, removing the busted-off bolt stumps was a major headache. Two had to be drilled out... a nerve-wracking and difficult procedure on an inverted crankcase, especially when you're using a hand-held drill...


Then it was out with the gearbox cogs and selector forks, and I whisked them off to Ray Easson M/C Engineering in Bayswater. Ray cast his eyes over the cogs and selector forks, and pointed out that in addition to 2nd gear, work was needed on 4th gear as well. Further, the hardening was starting to wear through on 5th gear (a common occurence on high-mileage GSX cogs), but Ray reckoned that there was easily another 50K kms to be done before I'd start to hear a whine. Well, I'll be a lucky man if I get to hear that in my lifetime, as the ZX9 is my regular around-town hack these days. So I left Ray to work his magic while I turned my attention to the rest of the motley Katana components.
Apart from the frame, the worst culprit was the wiring loom; the last 30 years had not been kind. So I removed most of the grimy old 'bullet'-style connectors, and soldered the connections instead (sacrificing originality for reliability is something I've never had a problem with). I re-bound the tattier parts of the loom, cleaned-up the block-connectors the best I could, and generally tidied things up.
I also took the opportunity to fix the busted tachometer needle. This meant making up a matching pair of instrument needles out of thin aluminium, which I sprayed with matt white paint and then glued into place:

First job with the frame was cutting out the rust from the footpeg subframe tubes, and welding back in fresh blanks of steel tube. That turned out to be the easy bit... because as I'd been pulling the bike apart, my eye told me that the pillion-area subframe wasn't straight. So I took the frame around to Pete's one evening, and using laser levels, etc. we found that it was 5mm bent to the right. So Pete fired up the oxy and we tweaked the subframe back 5mm.
Then the frame was packed off to the sandblasters; they took it back to bare metal and gave it a coat of 2-pack etch primer into the bargain. Once I had it home again I treated it to a couple of spray-cans of satin-black engine enamel from the local auto store. Sure, powder-coating might be the purist's choice, but once you chip the stuff it's... well, chipped. But at least if you use spray-cans of some commonly-available paint, you can fix up scratches or chips any time you feel like it. (This move was well-justified after Warwick and I heaved the motor back in, as inevitably there were a few small scrapes once we'd finished.)


Then, 2-3 months after dismantling, it was reassembly time! I popped in a fresh set of steering-head bearings, and an hour or two later I had a rolling chassis once again.

Now then, how do you move 100-odd kilos of motor if you don't have an engine stand, or a mate on hand to help you lift the thing? Well, one must get inventive... so I used my neglected weight-lifting gear to crane the engine off the coffee-table, and then used an old Victa mower chassis to wheel the motor outside for degreasing. Hopefully this is as close as a GSX1100 motor ever gets to powering a lawnmower...


I also installed a new set of 'Hel' braided brake lines front and rear, as the old set of braided line fittings had become a mess of rust and peeling chrome. Then it was back in with the wiring loom, throttle and clutch cables, switch-gear, battery box, other electrical odds and sods — and also the new Dyna coils were slotted in to their new brackets.
Later that week Warwick was back to get another hernia as we hoiked the motor back into the frame, and my youngest daughter Jocie skilfully slid the lower-rear engine bolt into place. Phew! The rest of the engine bolts were a doddle and it was a pleasure to torque them up. Back on with the oil-cooler, fresh oil into the motor (make sure you don't forget to do that, ahem), and the next day Alastair dropped in to help get things to firing-up stage.

Well the motor started easily enough, but alas the poor carbies had suffered sitting dry on the shelf for 2-3 months... the float needles just wouldn't shut the fuel off anymore, and several of the internal O-rings also weren't coming to the party. So I had to order a small swag of carbie parts, thankfully all still readily available courtesy of Robinsons and eBay.
15th Oct. 2012
The nice new carbie float needles (with soft rubber tips, as opposed to the old rock-hard items) arrived in the mail today! So it was time to pop them in — along with the new float assembly O-rings — and see if the carbies still wanted to piddle petrol everywhere. Thankfully they are now fuel-tight and the bike fired-up without a problem at all. So now I just have to repaint the tatty old fuel tank and then the Katana will back on the road.
Speaking of which, I saw a rather nice Kat flash past me on the way to work this morning; it's always great to see one of these classic blasters out on the road rather than sitting unfulfilled and gathering dust in some garage. 
19th Oct. 2012
So now I've repainted the tank... it was a bit of a challenge (as all painting seems to be for me... it's just not my thing) but the colour-matched acrylic came out of the can OK, and I gave the tank a couple of coats. Then 800-grit emery paper, a careful wipe-down, then the new decals, then 2 coats of clear lacquer to finish the paint off. I followed this up with some Kitten No.1 wax/cutting compound, and I think it looks pretty good even if I do say so myself. Maybe I can paint after all?!
Then it was time for finishing the reassembly and the first blast on the road to see how it all went. Well it would have been reassembly time, except that a major problem surfaced with the indicators: both sides were blinking at the same time — blast it, a short-circuit right when I want to get it on the road! After a couple of hours of poking and prodding and generally getting nowhere, I pulled apart the wiring loom. All to no avail, as it turned out: with everything in the open air and out of the loom, there were no faults visible and we still had the indicators doing their wretched thing. It wasn't entirely a fruitless exercise, however: I did discover that some goon in the distant past had used old bandaids to insulate a wiring join within the harness.  Some people honestly deserve to be HORSE-WHIPPED. So I fixed that shamozzle up and then got on with the problem at hand...
Next I pulled apart the notriously offensive LH Katana switchgear, thinking that might have had some dodgy contacts inside... but still no joy. (Note to the uninitiated: *never* pull apart that old Suzuki switchgear in the open air: little springs and ball bearings and plastic bits all go KER-BOOOINNGGG and ricochet across your workshop. If you must dismantle the switchgear, do it inside a plastic bag — a tip I learned on the GS Resources forum, but only after it was too late.) So I rang a local motorcycle mechanic of great repute, who said, "99% of the time, all indicators coming on is a short in the blinker box." OK, I shot off and bought a new blinker box from the local auto parts store, popped it in, and discovered that once again I was part of society's 1%. 
By this time the novelty was well-and-truly wearing off. However, further mucking around revealed a bizarre fact: when I connected a separate earth wire from the bulb body to earth, suddenly everything worked. Aha! — so the problem was a dodgy earth. I tried looking for it everywhere but I just couldn't find it in the end, so I just ran a separate earth wire for the indicator circuit to a cam cover bolt, and that was that.
However as I have further mused on things, I think I know what's done it: I've just repainted the frame, haven't I. Which means that the earth-wire that bolts to the RH electrical side-panel, that is in turn bolted to my nicely painted & thus reasonably insulated frame, is going to struggle to make it to earth. Hmmm... whatever, I may look at it later. For the time being I'm just happy everything is working.
Anyway, then it was time to put the bodywork back on, and also install a pair of new K&N RU-2922 filters. I was fairly salivating in anticipation of the first ride on the bike in months — but OF COURSE I then scored a leaking fuel tap, grrrr. (It seems that *nothing* fuel-related likes sitting dry for any length of time, does it. So next time I pull a machine apart, any rubber fuel bits are going to sit in a can of petrol on the shelf.) But it finally stopped dripping after giving the tap lever a gentle wiggle, so then I fired up the bike. She started without a problem while I grabbed my jacket and helmet and took off for a fang around the local lakes. No problems at all, really!
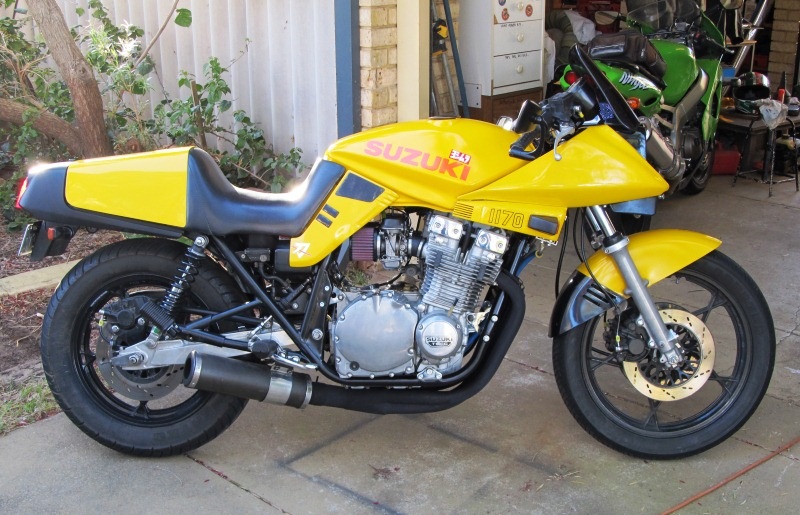
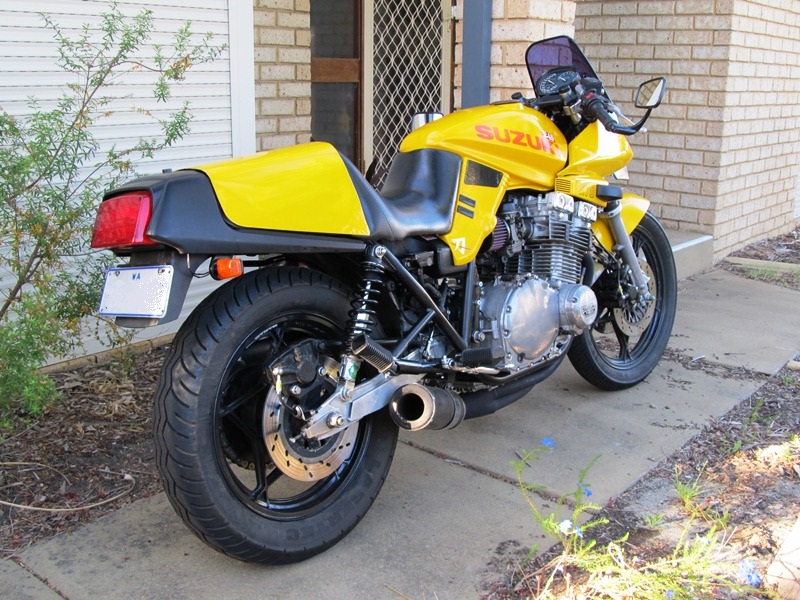
So I'd better put a few photos of the finished machine on the page here, because this is as good as the Katana is going to look for a long time, I suspect.


* * * * *
