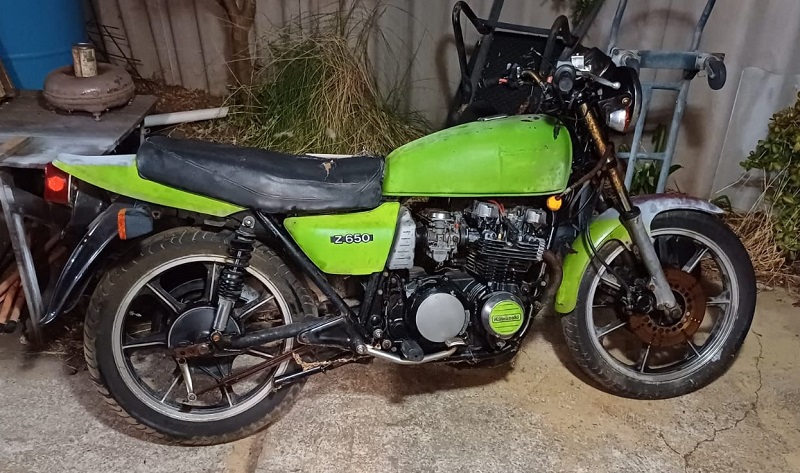
What better way to kick-start 2024 than a text early in the morning from mate John on New Year's Day, telling me that he'd just found two motorcycles being given away locally. Of course the lady's phone was ringing hot even at that early hour, so we said we'd pay $100 each for the bikes and be right around to pick them up. John scored an XS250 and I got this '81 z650. Not an early model but a sought-after classic nonetheless. The good thing about both bikes is that, as dilapidated and weather-beaten as they are, they are complete and perfect projects for us denizens of the biker's man cave! As this bike was originally a burgundy colour, I have dubbed it Ron.
I got the z650 home and set to work right away. I wrestled the carburetors out, hooked up a car battery via a couple of jumper leads, squirted some ether down the inlet manifolds, put a screw driver across the starter solenoid terminals and YES the engine zoomed into life and choofed out a huge cloud of black smoke which slowly drifted Chernobyl-like across the suburb. Victory! So, knowing that I've got a runner, it's time to start ordering carburetor kits, new inlet manifolds, etc. Let's see if we can get this thing running soon.
Here's the fix/ to-do list so far...
- Dropped the oil and found it was 50% petrol...
- ... and yes, found the cause: a hole in the fuel tap diaphragm which had allowed the combustibles to slowly drain into the sump via the vacuum hose. Fuel tap rebuild kit should be here soon.
- Of course the sump (oil pan) plug had been stripped and held in with Loctite (!), so I drilled the hole out and have installed an M14 x 1.25 plug in place of the OE M12 item.
- Rear brakes are drum operated and work just fine.
- The front brakes, however, will need the calipers overhauled with new pads. The front brake master cylinder is hopelessly corroded so an aftermarket item will have to be found.
- Tyres hold air but are rock-hard and have more cracks than a dry lake bed. Plan is to replace them as the rest of the bike nears completion.
- Managed to free up the clutch cable and get that operating for the first time in decades. You have to like a fix that costs nothing but some elbow grease!
- Fibreglassed the rusty and flimsy seat base, and will get a new vinyl cover stitched up.
- Tried rescuing the speedo cable but it was rusted up and a new one was pretty cheap.
- The rear Koni shock absorbers are in good condition, so will be getting a rebuild and fresh damping oil.
- The old switch gear is weathered, really beaten up, and has that early 80s chic that I just don't like. Some new retro-styled switch gear blocks are on the way.
- Carburetors have been fully dismantled. Had a bit of a struggle with some recalcitrant brass bits not wanting to budge, but we got there in the end. Rebuild kits should be installed soon.
- The fuel tank isn't too bad on the inside, but will need an epoxy sealing kit. POR15 is my favourite product for this sort of thing.
- Paint? Yes please -- but not the original burgundy (sorry Ron). Thinking some sort of metallic blue at this stage.
- Tank "KAWASAKI" badges are missing, but found some OK 2nd-hand items online. One of the side cover "z650" badges is missing. I wonder how hard it would be to reproduce by using it to make a mould into which I can pour some epoxy? That should at least be fun to try.
- My Inner Scrooge rejoiced when I was able to salvage and tidy up the rusty old air filter frame. It will get some air filter foam glued onto it, and then lightly oiled. Always have preferred this to the paper filters anyway. Fully cleanable and clinical trials prove that oiled foam is much better at filtering out the dust. Well, that's what Scrooge says ;-)
- The rubber inlet manifolds (that go between the carburetors and the cylinder head) had long ago fossilized into solid lumps of coal, so new (aftermarket) ones will be installed, with a complementary set of new air box rubbers.
- Still not sure what I'm going to do about the indicators. OEM items would be nice, but hard to find with the correct stem hardware for this model. We will see.
And so on!
23 Jan. 2024
Well I got the refurbished carburetors re-installed, and thought I'd see if the bike would start and at least idle in some sort of fashion. But it soon become clear that the starter clutch was absolutely clagged, and would only momentarily catch hold of the starter ring gear and thus turn the motor over. Well it's safe to say that this is why the thing was parked up. So I psyched myself up and on Sunday afternoon I started work to pull the motor out. Question was, how to lift it out without help and without breaking my back? The engine hoist was the obvious answer and it worked a treat.
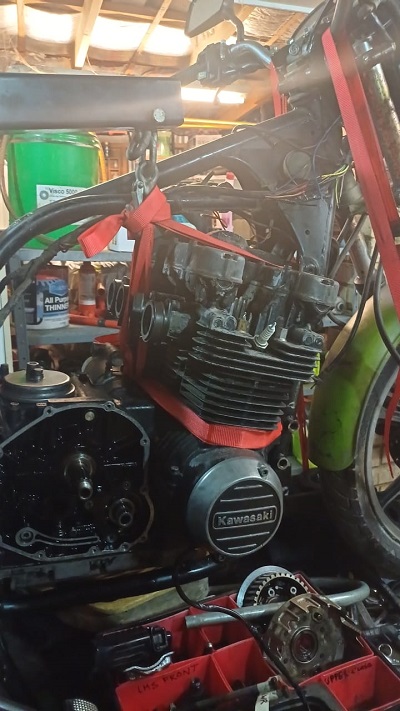
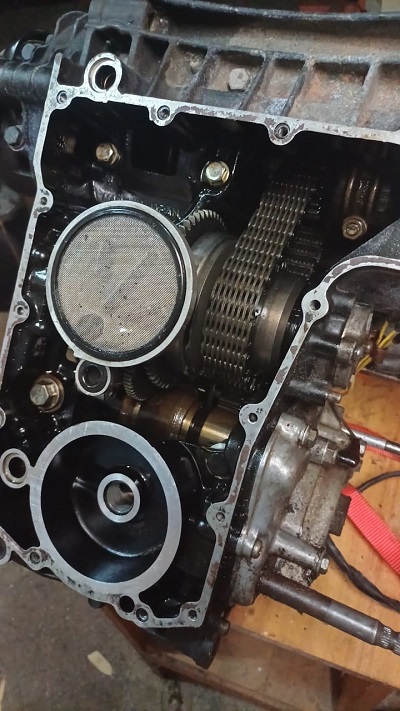
Then I plonked the donk on a small table which creaked and groaned while I opened up the bottom of the motor and hauled out the shaft with the starter clutch on it. At last I had the starter clutch assembly in my paw, and the problems were clear: two out of the three high-tensile Allen bolts that secure the starter clutch were loose and rattling around. Well that's not going to help, is it.
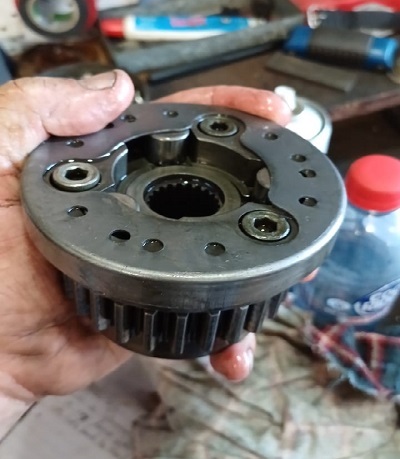
But worse, two out of the three small plunger springs which push the rollers against the hub of the ring gear had jammed their respective plungers into the body of the clutch, and therefore couldn't do their job. After a bit of fiddling I managed to get them loose (thankfully the small plungers have little holes in the top, where you can insert a small wire hook and flick them out), and found a couple of spare plunger springs in my collection of bits. Some new high tensile Allen bolts with Loctite were also installed, and back together it all went. The engine was hoisted back into the frame (momentary worries from the hydraulic ram on the hoist which decided to start playing up), engine mounts re-installed, and at about 11:30pm I was congratulating myself on a job well done when...
... what did I spy sitting on the bench but a lonesome caged needle roller bearing. 'Ah,' I thought, 'that will go in the clutch proper.' Well no, it didn't. And then the ugly truth dawned on me: it was the needle roller bearing that supports the inside of the starter ring gear! Grrrr... so BACK OUT with the motor, opened it all up AGAIN, installed bearing, nipped it all shut and called it a night. Actually the only reason I didn't keep going was because I was pretty sure no one would appreciate the clatter of the rattle gun going off in the wee hours. Finally got it all back together and slotted into the frame for the second time. And YES... the starter clutch now works. Phew!
The other items are relatively small-ticket: cleaned and re-installed the drive chain as it's actually not too worn and will do the job, at least initially. Also popped in a new 6-pin connector block for the reg/rectifier, as the old one was cactus. I'm pleased to say that the stator looks to be in good condition (no cooked or darkened windings), the rear Koni shock absorbers have polished up nicely and their chromed shafts are in perfect condition. So those are some nice small wins to help heal the trauma of the starter clutch saga.
The real challenges will be (i) the front forks and brakes (everything is shot), (ii) the bodywork and paint, (iii) getting the seat recovered by someone who knows what they're doing, and (iv) wiring in the new switch gear correctly. Apart from that I reckon the thing is basically a goer. But lets not count our pterodactyls before they hatch...
25 Jan. 2024
Dismantled the front calipers today. Nothing nasty to discover except shot and oil-contaminated pads and a bunch of rubber boots way past their best. So just a couple of kits and the front brakes should be sorted.
17 Feb. 2024
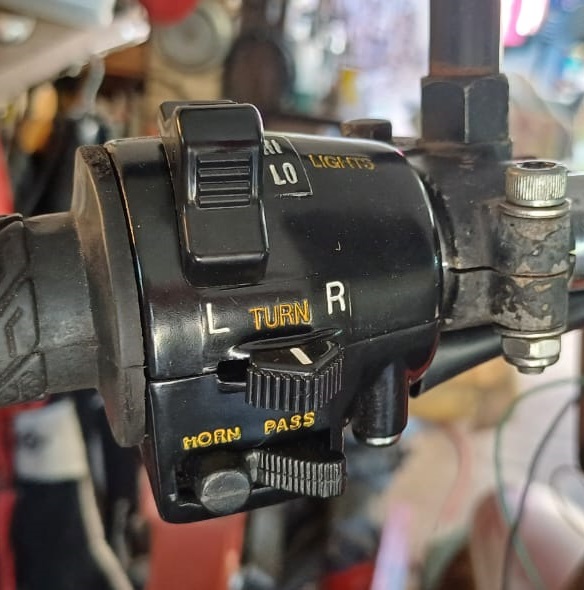
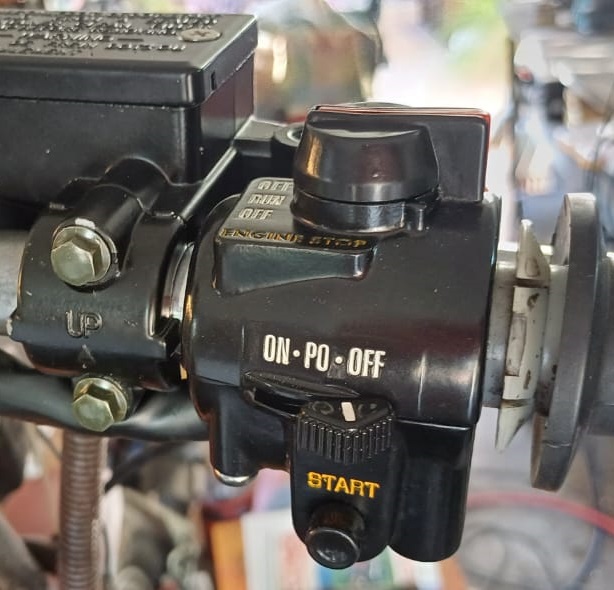
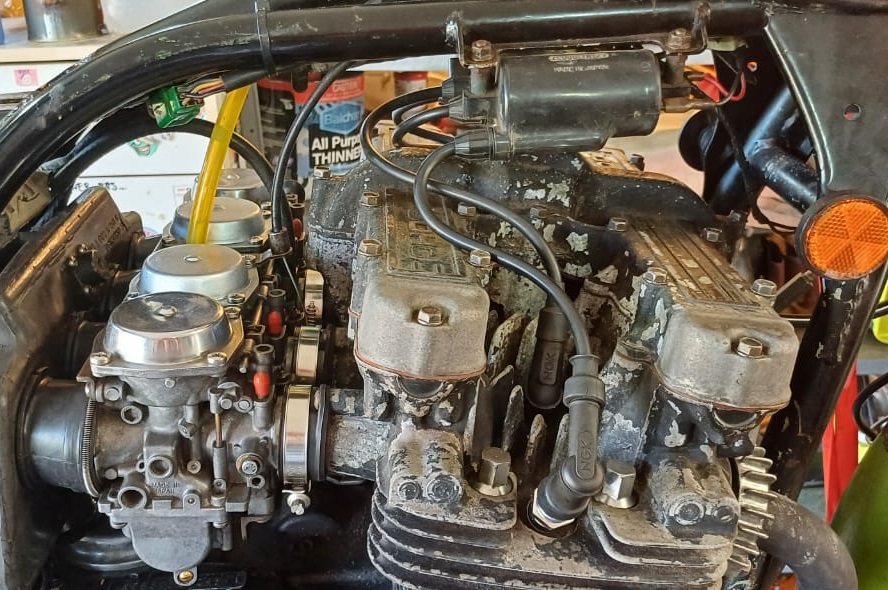
Finally got the pattern z900 switch gear wired in. What a mini saga that was. It would have no doubt helped if I wasn't such an electrical doof-head, but I got there in the end. Anyway, this meant I could get ignition happening, and therefore the chance to fire the thing up. It started on full choke but a quick tour of the header pipes with the laser temp. gun revealed that not much at all was happening on cylinder no.1. Not to worry, that means it's time to lift off the cam cover and see if we have a stuck valve or something. But I have to say that the valve train was suspiciously quiet, so I think that the valve clearances will need attention. One step at a time ;-)
28 Feb. 2024
Yes the bike has been running and I've got the carbies more or less set up correctly... but the bike hasn't been running really brilliantly, I'm afraid. As is often the case, installing a cheapie set of aftermarket rubber intake manifolds was a mistake, and the wretched things are allowing air to be sucked in and the running is very erratic indeed. But not to fear, a set of genuine Kawasaki manifolds are on the way. Other than that I have just been polishing up different bits and fettling this and that, so that when the new manifolds arrive I hope to take it for a quick spin around the block!
11 Mar. 2024
Tell me this: how is it possible for a bike's front forks to have nearly no oil in them -- more like tar, really -- and about 50ml of water? It would seem that the abysmal art of neglect has reached new depths. Installed the new inlet manifolds and alas #2 cylinder isn't really firing at all; header pipe temp. of 130 deg. C as opposed to 300 deg. C on the others. So checked the compression and it's only about 65psi... time to whip the head off, clearly. Took a peek in through the spark plug hole and I can see lots of oil... certainly more than was in the forks. That must be where it's gone!
20 Mar. 2024
I'd noticed that when the bike was running the tachometer was pretty sluggish and v-e-r-y slow to respond to changes in RPM. Pulled it apart and yes, the same problem that I'd run in to with the occasional Suzuki GS tacho: the grease used at the factory had slowly run to the bottom of the 'bell' (in which the magnet spins) and was fouling the housing. Wiped it away and the tacho is now responsive and behaving the way it should 
23 Mar. 2024
I spied some really cheap indicators on eBay... chromed plastic, but at only about $25 for the set I thought they had a reasonably classic style and just might work until I get some KZ900 replica indicators or whatever. They arrived the other day, got them wired in and mate, they are GOOD. Sure, plastic with 'chrome'... but well-proportioned, classic style, and work a treat with nice bright bulbs. Hard to argue with that.
The rebuild kits for the front brake calipers finally arrived, so with a couple of hours' fiddling I had them reassembled and installed. But forgot to order a new bleed nipple for the RHS caliper, so that has to arrive before we can charge the system and get the front brakes working. Not like there's any hurry, so all in due course. Which probably means when we get back from overseas. Easy does it ;-)
25 May 2024
So I'm not in the country but thanks to the wonders of the internet I've been able to source some correct indicators for this model (with correct stems), a new rubber cushion for the fuel tank, a new seat cover, new correct style mirrors (and convex, too), and a new headlight rim. All will be waiting when I return to Oz 
Handy z650 stuff...
John Surr's KZ650 page ... wiring diagrams, parts fiches, everything for the later z650 models.
And from John Surr's site, here you can download the colour wiring diagram for the KZ650F3, which is the wiring setup the '81 Australian z650 received.
* * * * *
